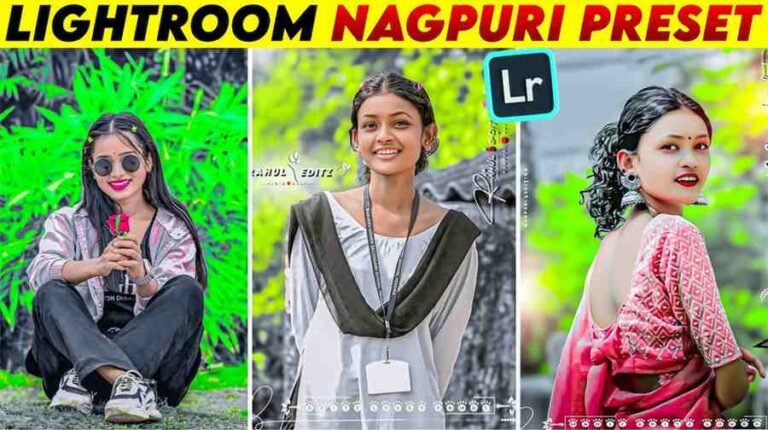
Do you want to make your simple photo look great in just one click? Many people tell me that their photos do not look good even after editing for hours. This Lightroom Yellow Photo Editing Preset works like magic to solve this problem. I know you do not like hard editing work.
I have one easy magic solution for this big problem. That is turning your photo background into a beautiful yellow color in just one click. No matter what color the trees or things are in your background, this trick will give them a great yellow vibe. It is so easy that even a five-year-old child can edit their own photo.
Today I have brought a special thing for you which I got from a photographer friend. I have used this lightroom yellow tone photo editing trick myself and got great results. So, I thought I should share it with you. I will also tell you about my own experience with lightroom yellow effect photo editing in easy words.

What is Lightroom
Lightroom is like a magic wand that you can use to make your simple photo look professional. It is a great application for decorating photos or doing color grading. I am giving a small table below so you can understand it easily.
| Topic | Details |
| App Name | Adobe Lightroom |
| Made By | Adobe Inc. |
| Came in Market | 2007 |
| Total Installs | More than 100 million on Google Play Store |
| App Type | Professional photo color grading app |
| What it does | Fixes photo color light and contrast |
This app is the first choice for almost all smartphone photographers today. Because it is very easy to use. You can change the color of your photo as you like.
About Lightroom Yellow Photo Editing Preset
Now let us talk about our main topic. Many people want to know what this Lightroom Yellow Photo Editing Preset actually is. To put it simply, it is a readymade setting or formula. If you put it on your photo, the color of the photo will change in one second.
This preset mainly changes the green or any other color of the photo background into a soft yellow color. Suppose you took a photo in a garden. Using this yellow tone lightroom photo editing will make it look like you took the photo in the sweet sun of a late afternoon.
The best part is that you do not have to match any color or light settings yourself. My photographer friend made it so perfectly that it looks good on any photo.
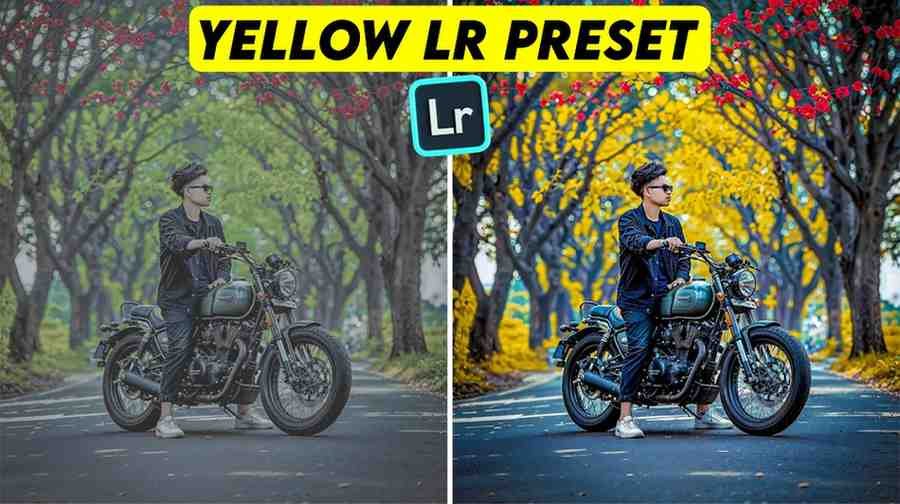
See the Magic: Normal vs Pro Yellow Edit
Can you believe it just by words? So, I edited a simple photo with this preset myself. I am surprised to see the result. You can understand by looking at the photo.
The photo on the left is a simple photo taken with a normal camera where the leaves in the background are green. And on the right photo I have used my yellow preset Pabitra edit style trick. See how the whole background has become a beautiful professional yellow.
Looking at the photo gives a different feel. Your photos will also look just as great. Getting such a beautiful result without any hard work is a matter of wonder.


How to use Yellow Presets in Lightroom Step by Step
When it comes to how to use Lightroom Presets, many people get a bit scared. It can be any color preset like Red, Green, Blue, or Cinematic. But the rule is as simple as water.
First you have to install the Lightroom application on your mobile. You will get it very easily from the Play Store. And if you are an iPhone user, you can download it from the App Store easily.
Then open the application. Here you can create a free account with your Gmail ID. Whenever you open the application, you will see a blue color button at the bottom. Click there and add the photo you want to edit and our preset photo from your gallery.
Now open the preset photo given by me. Click on the 3-dot option at the top and select Copy Settings. Then open the photo you want to edit. Go to the 3-dot option again and click Paste Settings.
That is all. Using this small method will edit your photo in just one click. After that you can do a little light or color customization as you like.
Key Features
Let us see what benefits you will get in this great preset. I have not kept any hard settings here like Lightroom hard preset. Everything is very easy.
- Full HD Quality
- Free to use
- Comfortable in mobile and PC
- No Watermark
- Premium preset quality
- Single Click Edit
- Easy Color Customization
- Soft Yellow Aesthetic Tone
- Non-Destructive Editing
How to Get Cinematic yellow Lightroom preset
Now when it comes to where you will get this Lightroom Yellow Photo Editing Preset. Do not worry about this at all. I am telling you in detail. Because you do not have to go anywhere else to find this preset.
You can see a photo of a preset just below this article. But wait. Do not save it thinking it is the preset. Because it is used only to show you a demo.
To get the real preset, you will find a button just below that photo. By clicking that button, you can save this preset in your mobile gallery. It is easy, isn’t it not.

My Experience: My problems and solutions while doing yellow color editing
When I first went to do this editing, I fell into a strange problem. The background became yellow, but my face color also became yellow like a patient. At first, I was scared thinking what mistake I made.
Then I started checking the Lightroom options for a long time. Then I understood that if you go to the Color Mix option and decrease the saturation of the orange color a little, the face color becomes normal.
Before this I was used to using Lightroom preset Green, so it took some time to understand the yellow setting. But once I understood the matter, there was no more problem. Those of you who use this preset can use this small trick to fix the face color.
Conclusion
I hope you have really learned something new from today’s article. I have tried to explain very easily how to give a professional look to a simple photo using the Lightroom Yellow Photo Editing Preset.
Do not forget to tell me how your photos look using my Cinematic yellow Lightroom preset. If your photos are beautiful, I will also feel very good. Today it really feels like I could teach you something.

Frequently Asked Questions (FAQs)
Q1. Is Lightroom app totally free to use.
Ans. Yes, you can use the basic and color editing features of Lightroom for free.
Q2. How to add presets in Lightroom mobile.
Ans. Just import the preset photo from the gallery into Lightroom, and it will be added inside the app.
Q3. Why my Lightroom preset is not working properly.
Ans. If the original lighting of the photo is different, sometimes you have to do a little manual adjustment, then it will be fine.
Q4. Where can I find professional Lightroom presets?
Ans. You will get professional quality presets from the download button given below my article.
Q5. Can I edit the background color with one click?
Ans. Yes, if you paste the settings of the preset given by me, the background color will change in one click.