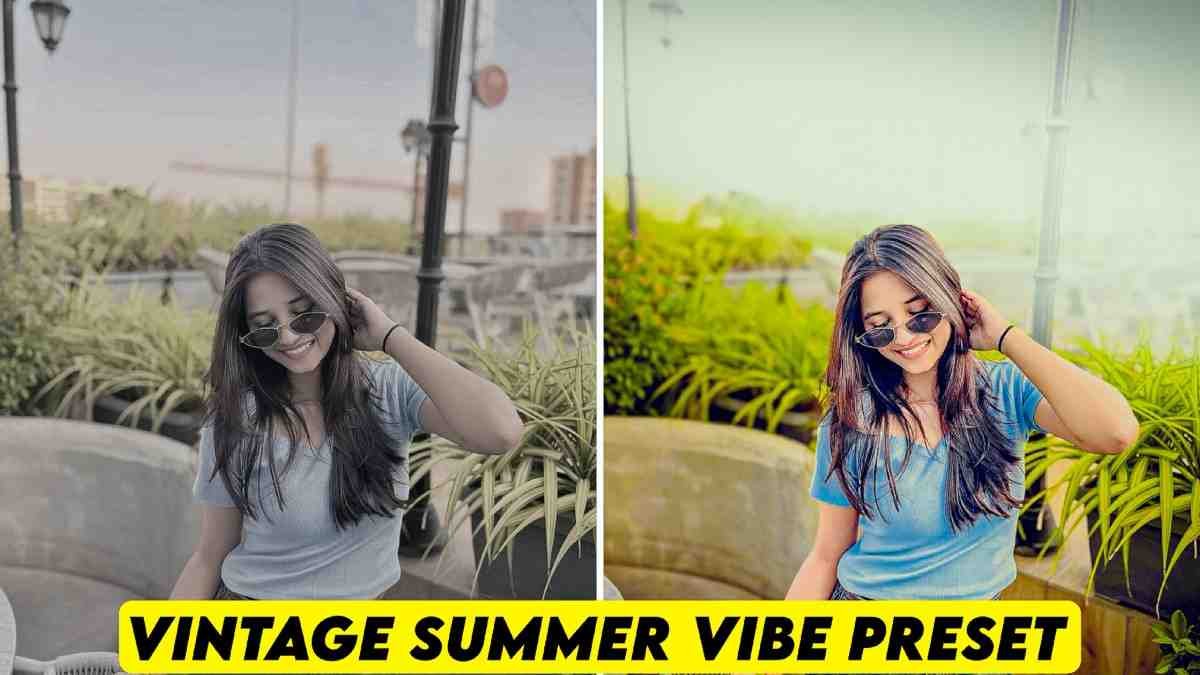
Make your normal photos look professional in just one second by using Desaturated Woods Lightroom Presets. Many times we go to beautiful places and take photos but the background or back colors of those photos are not like what we want. Sometimes the green color looks too bright or sometimes the photo looks very simple. Do you want to give your simple photo a professional look with a great grey color magic. Then do not worry at all because today I will solve this problem for you.
I know that many of you cannot do color grading like you want even after trying many times. When I first started editing I had the same problem too. The moody forest vibe did not come at all. But today I will tell you about a secret preset that can change the background of any photo into a desaturated woods look. Because of this your photo will look more attractive and premium.
Getting Started The Basics
Before starting the editing we will need some small things. First the Lightroom application must be installed on your phone. If you use Android you can get it from Play Store and if you are an iPhone user you can get it very easily from App Store. Open the application and make a free account with your Gmail ID. This is very easy to do just like we open accounts on Facebook or WhatsApp.
When I first started using Lightroom I thought it might be very hard. But believe me once you understand the rules it will become as easy as water. I got this lightroom preset from a very close photographer friend of mine. When he showed me that the look of the photo changes in just one click then I was very surprised. So I thought I should share this great thing with my friends that means you.
Step by Step Editing Guide The Core Process
Now let us start the real work. To start editing we first need to fix the light of the photo. When you import your photo in Lightroom go to the light option and decrease highlights a little and increase shadows a little. This will make the dark parts of the photo clear and the bright places will look beautiful. After this we will decrease the blacks option a little so that a light depth comes in the photo. Remember that the correct balance of light is the main key to good editing.
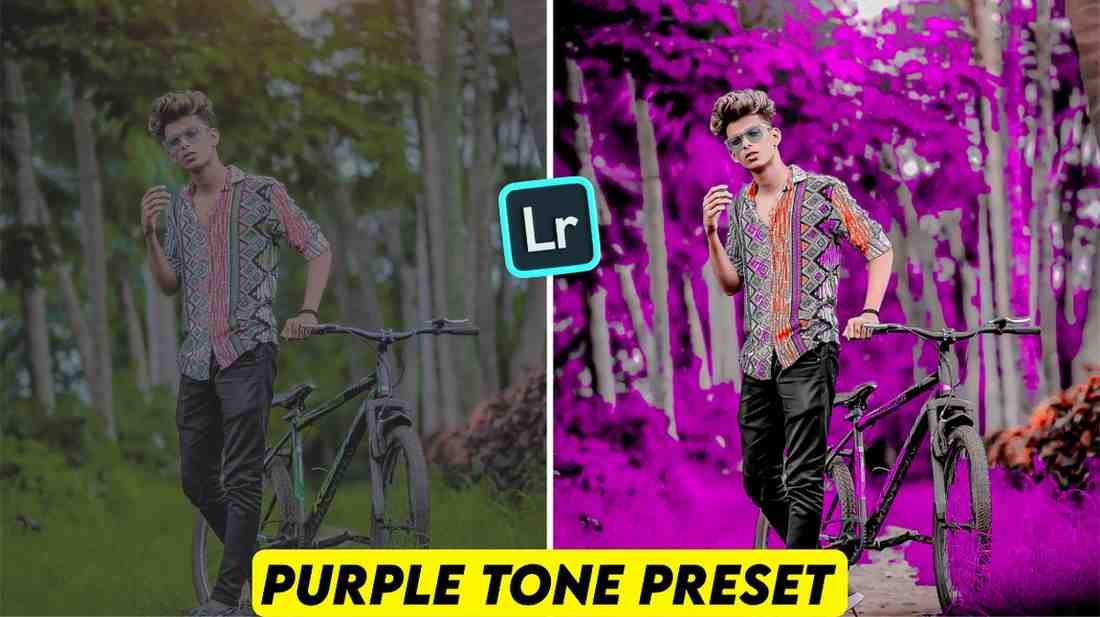
The next step is the game of colors. Go to the temperature option and move the photo a little towards a blue or cool tone. But not too much so that the photo looks natural. Use the tint option very carefully here. We want to bring an earthy tone like soil. When I went to do this for the first time I made the photo too blue by mistake. But later I understood that making small changes is the best way.
The most important part is decreasing the color or desaturation. The real work of our Desaturated Woods Lightroom Presets is to decrease green and yellow colors. Go to the color mix tool and decrease the saturation of green color completely. In the same way decrease the saturation of yellow color too. You will see that the forest or trees behind your photo have taken a beautiful grey or dark color. This will bring the professional look we want.
At the end we will do color grading. Go to the shadows and highlights part and give a very light touch of blue or cyan color. This will make your photo look cinematic. If you want your photo to look very different then do this step carefully. I have learned this method by practicing many times. At first you might feel that the colors are not matching but you will become a master of this after doing it two or three times. In this way you can very easily change your photo into foggy presets lightroom style.

Advanced Techniques for Depth
Using the tone curve is very important to bring depth to the photo. If you lift the bottom part of the photo a little then a beautiful faded look will come in the photo. Many people call this the S curve. When I first learned this I understood why big editors make their photos so beautiful. These small tricks make your photo different from others. So do not be afraid and play with this curve tool a little.
Next comes masking. This is a magic tool. If you want the forest behind you to be grey but your own face to look bright then use masking. Create a mask on yourself and increase exposure and sharpness a little. This will make you stand out from the background. Doing this small work will increase the quality of your photo. I did not know this before either but later I learned it by watching many tutorials and trying it myself.
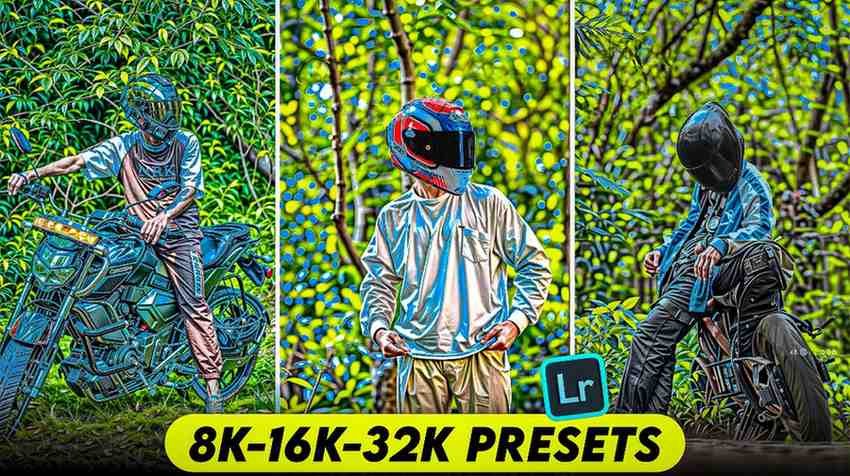
Finally do not forget to increase the texture and clarity of the photo. Increase clarity a little to show the details of the tree bark or leaves beautifully. But do not increase it too much or the photo will look rough. Adding a light vignette will make the area around the photo a little dark and everyone will look at you. If you work step by step in this way you can make a perfect moody forest lightroom presets look that everyone will praise.
How to Install Desaturated Woods Lightroom Presets?
Using this preset is very easy. First add your favorite photo from your gallery and our given preset to the Lightroom app. Now open the preset and click on the three dots option at the top corner. There you will find a button that says Copy Settings and press it. Now all the settings of the preset are copied to you. Now open your real photo that you want to edit.
Click on those three dots at the top again and now press the Paste Settings button. You will see like magic that in one second your normal photo has been edited professionally. This is the biggest benefit of using preset lightroom. You do not have to waste hours of time anymore. You can make any photo great in just one click. I edit all my photos like this now.
How to Save Your Photos Without Losing Quality?
After the photo is edited it is very important to save it correctly. Many people see after saving the photo that the photo quality has decreased. To stop this click on the share icon at the top. Then choose the Export as option. Keep the file type as JPG there and make the quality one hundred percent. This will keep the details of your photo perfect and when you post it on social media it will look very clear.
I always try to save photos in the highest quality. Because after editing with hard work if the photo becomes blurry then everyone feels bad. If you notice these small things your work quality will increase a lot. You can save photos in the same way on a PC if you want. Remember that the saving process must be correct to get good output.
How to Get the Lightroom Presets?
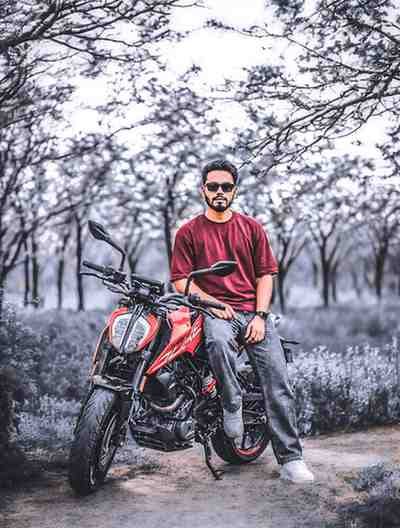
Getting this preset is very easy. I have kept it very close for your help. Below you can see a photo of this preset. Remember that this photo is not the preset it is used only to show you. Right below this photo there is a beautiful button where Get Access is written. Just click that button once and this magic preset will be saved on your phone.

I want you all to learn the best editing very easily. So I have given the chance to go to this link directly without any trouble. You do not have to search anywhere else. This is a gift from me for those who have read this article from the start to this point. I know that when you use this your heart will be full of joy.
- Full HD Quality
- Free to use
- Comfortable in mobile and PC
- No Watermark
- Premium preset
- Nature Presets Lightroom style
- One click editing
- Professional color grading
- Moody Forest look
My Own Experience and Problem Solution
When I first started this kind of grey color editing I faced a very big problem. Whenever I decreased the saturation of green I saw that my own skin color or shirt color was also becoming faded. I could not understand why this was happening. I felt very sad then. I thought I might never become a good editor. But I did not give up.
After trying many times I understood that every color has a different work in the color mix tool. The orange color usually works on our skin color. So if I do not touch the orange color while decreasing the green saturation then my skin color stays correct. It took me a long time to learn this small thing. Today I told you that very easily so that you do not face the same problem like me. When you edit remember that the result is always good if you do it slowly and calmly.
Conclusion
I hope that after reading this article today you have a clear idea about Desaturated Woods Lightroom Presets. By using this preset you can take your photography skills to another height. I always try to bring something for you that really helps you. Not only this preset you can also try using mountain preset lightroom or northlandscapes preset. At the end I will say only this that practice regularly and use your creativity. If you have any questions please tell me and I am always with you.